React Practice Components
This assumes you’ve gone through my Test Drive React (Hello World) tutorial. If you haven’t yet, head over there (it only takes about 3 minutes) and come back once you have a running app.
Ideas for Practice
You’ll get better at React like you get better at anything – with practice. Except it can be a little daunting to figure out what to write. Once you’ve got that sweet Hello World under your belt, should you move on to learning Redux? Setup a build with Webpack? Write some tests?
Nope.
Before you tackle the rest of the React ecosystem (and you’ll get there soon enough), you want to have a really solid understanding of core React concepts and APIs. There aren’t many of them. But it’ll save you a ton of time later on if you know how to “think in components.”
So let’s write some components!
Is this a walkthrough?
I want you to learn this stuff, so I’m not going to provide a ton of guidance here. But I will try to provide these practice suggestions in a way that builds in complexity, so you’re not immediately over your head. If the first few seem too easy, skip on down the list a bit.
Where do I write the code?
Use the Hello World tutorial as as starting point. Put everything in one file for now. The bottom (export default ...) component is the “root” one. Ideally its render method will include only a single component.
0. Hello World
Hopefully you already did this one
1. Nested components: Simple Card
This is a common pattern seen around the web. Facebook messages, Tweets, and so on:

Start off with a simpler version:
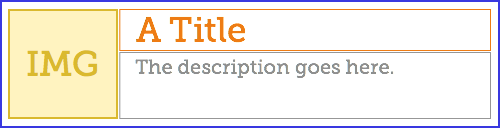
Create a component for every rectangle, and figure out what props each one needs. It’s often easiest to start at the “leaf” nodes and work your way up – build the simplest, innermost elements first.
Title- This is a simple text display. Takes as a prop thetextto display.Description- Another simple text display. Takes as a prop thetextto display.Image- A single image. Takes as a prop theurlof the image.SimpleCard- the wrapper component. Takesitemas a prop.itemhas a stringtitle, a stringdescriptionand a stringimageUrl.
Once you’re done, the root component’s render function should return a <SimpleCard item={item}/>.
SimpleCard’s render function should return something that looks like this:
<div className='simple-card'>
  <Image url={this.props.item.imageUrl}/>
  <Title text={this.props.item.title}/>
  <Description text={this.props.item.description}/>
</div>
Maybe you want to wrap Title and Description in a div so that you can style it appropriately. It’s up to you.
2. Nested components: Facebook Comment Card
Follow the same pattern, and build the slightly more complicated Facebook comment card:
Draw rectangles around every element before you start building, either in your head, or print it out if you have to.

I’d create a component for the “2 seconds ago” item because I could see that being used all over the place. “Name . Location” could be a single component, or you could nest it further.
If you’re unsure, err on the side of “stupidly small components” rather than big, complicated render methods. This is what makes your code easier to reason about, and if you’re still on the fence about mixing templates and view logic, it definitely helps to keep the “template” part as small as you can.
3. Lists / Arrays
If you come from Angular, you’re used to ng-repeat to create lists. React doesn’t have custom syntax for this, it’s just regular Javascript.
Inside the render method you can use map on your array to turn it into an array of components (assuming this component was passed a prop items={an array}:
function render() {
  return (
    <ul>
      {this.props.items.map(function(item) {
        return <li key={item.id}>{item.name}</li>
      })}
    </ul>
  );
}key prop passed to the li? Any time you create an array of child components, React needs each one to have a unique key so that it can make its DOM diffing algorithm work. You can read more here. React will warn you (in the console) if you forget this.
Try creating a list of Simple Cards, or Facebook Comment cards, using the components you created above.
4. Composing children: Table component
Angular has this concept of “transclusion” that lets you pass content into a directive. It comes with a lot of gotchas, and it’s pretty limited – you can’t easily split up the children, find specific children, or anything like that without writing some complex hard-to-debug code.
React has a much nicer solution. Any components nested inside another are passed via the children prop, and the parent component can decide what to do with the children.
var Container = React.createClass({
  render: function() {
    return (
      <div className='container'>
        <div className='row'>
          Here are the children:
          {this.props.children}
        </div>
      </div>
    );
  }
});
var Demo = React.createClass({
  render: function() {
    return (
      <Container>
        <ul>
          <li>Joe</li>
          <li>Mary</li>
          <li>Jane</li>
        </ul>
      </Container>
    );
  }
});
Try using the children prop to create a Table component that accepts a series of Row components as children, and renders them inside a table structure:
<table>
  <tbody>
    <!-- children go here -->
  </tbody>
</table>
Make sure your Row components return valid HTML elements that can nest inside a tbody (e.g. Row should return a tr). Open up the Elements tab in the Chrome DevTools (or equivalent) and look at the DOM structure that’s generated by your Table component.
Enough for now?
Hopefully these exercises are helpful. You can take them as far as you’d like – once you’ve got the basics down, try recreating the structure of Slack or Twitter or some other large site with a lot of nested components.
Don’t worry about routing, interactions, and all that at first – just take some static data and render it. This is a great way to learn core React without getting bogged down in all the details. Have fun!