Starting a blog looks difficult. You have to come up with a name, set it up somehow, figure out where to host it… it’s enough to make you just give up and go write on Medium (or not at all).
If you manage to get started, there are yet more obstacles. How can you grow an audience if you’re starting from zero? How do you figure out what to write about? And then – how do you keep writing, even when you don’t feel like it?
That last one is a doozy. “I feel guilty that I haven’t published in so long” has gotta be the #1 killer of blogs.
So in this 2-part series I want to walk you through:
- How to set up a blog in 10 minutes with GatsbyJS
- How to host it for free on Netlify
- How to come up with endless writing ideas
- …ideas that will people will want to read, that will grow an audience
- How to fight your feelings, keep writing, and keep shipping
Here in Part 1, we’ll cover the nuts and bolts of getting a Gatsby blog set up and deployed.
In Part 2, we’ll go over some strategies for coming up with ideas, growing an audience, and sticking with it.
Create Your Blog with Gatsby
You might’ve heard of Gatsby. It’s a static site generator written in JavaScript and backed by React and GraphQL, and it’s gaining a ton of popularity lately.
I’m brand new to Gatsby myself, and I thought I’d write up this guide as I figure things out.
Gatsby allows you to write in Markdown, a simple plain text format that’s easy to learn and easy to write with. Gatsby then takes the Markdown files and generates the HTML blog posts.
That’s just one small facet of what Gatsby is capable of – so don’t take this to mean that Gatsby is only for blogs – but since we’re talking about blogs here, I’ll keep things focused on the blogging use case.
The community is strong and growing, so you can find help if you run into problems. Gatsby is a great choice if you want to start a blog today, and you want to be able to tinker in JS.
Let’s walk through setting up your blog right now. You’ll need Node and NPM installed first.
Watch this quick run-through of the process, or follow along below.
First, install the Gatsby CLI. This will give you the gatsby command:
npm install -g gatsby-cliThen, create your new blog:
gatsby new my-blog https://github.com/gatsbyjs/gatsby-starter-blogThen change into that directory and start up the Gatsby development server:
cd my-blog
gatsby develop
Within a few seconds you should see something like this:
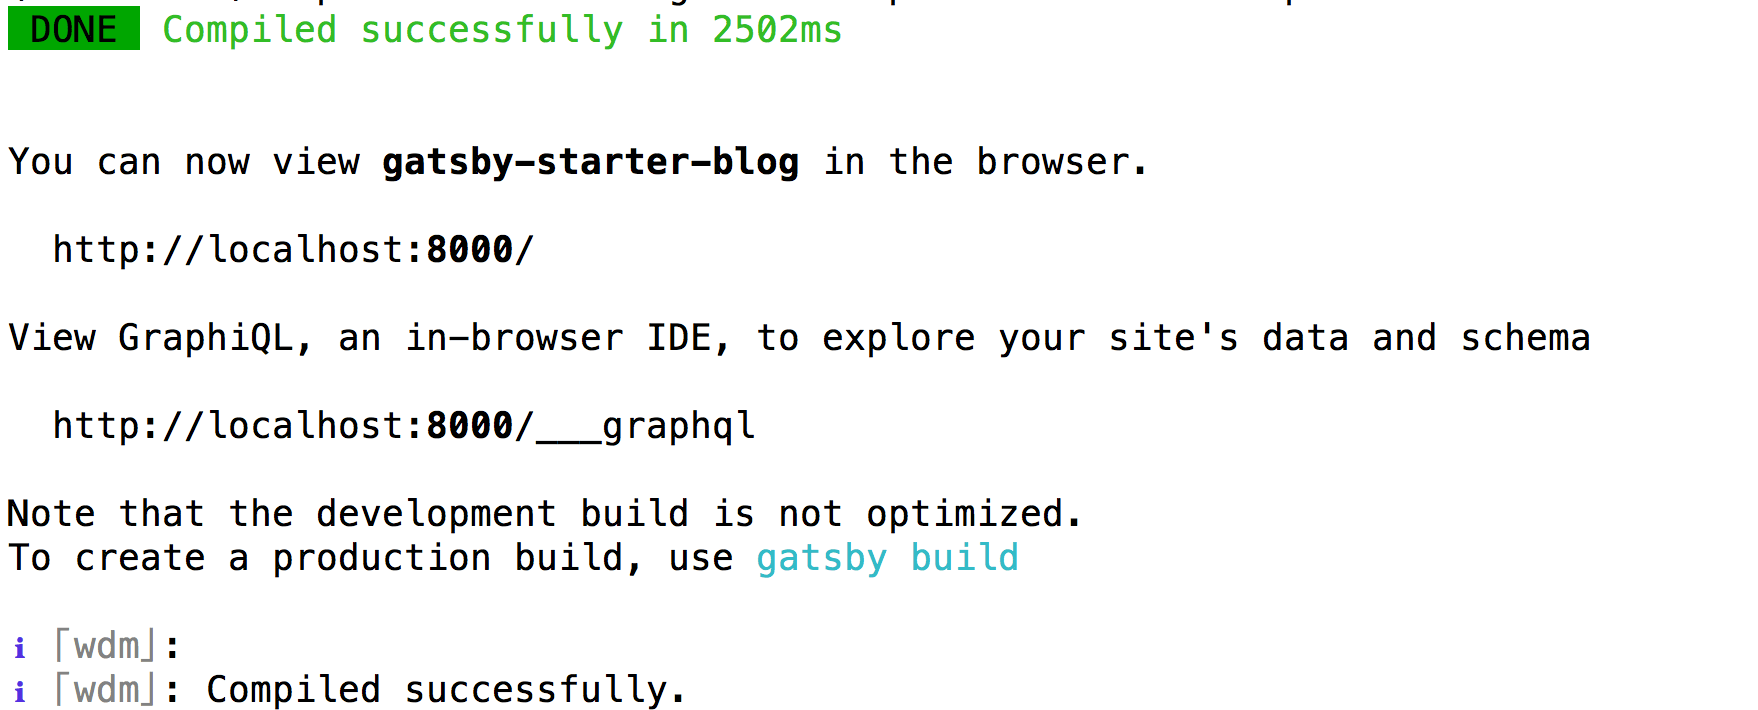
Open up your browser to http://localhost:8000/ to visit your new, currently very local, blog.
Keep that development server running.
Let’s go over a couple things and then we’ll look at how to customize it and write new posts.
Static vs Dynamic Sites
Gatsby will turn your blog posts into a static site.
A static site is different from something like WordPress, which is dynamic. A WordPress blog requires a server running the WordPress software, and that software does all the heavy lifting. Editing is done in the WordPress editor, and the pages are served to visitors by the WordPress backend.
A static site, in contrast, is just files sitting on a server. Plain HTML, CSS, and JS. No code to run, no special server required.
The big benefit of a static site is that the server doesn’t need to be powerful at all, and so there are a bunch of free options available. A static site can scale to thousands and thousands of viewers, because the server has very little work to do. Additionally, your site is less likely to be hacked, since there’s no “admin interface” or blog generation code running server-side.
This here blog is a static site serving thousands of views per day, for free.
“But I don’t like Gatsby!”
That’s fine. Gatsby is not for everyone. Feel free to pick another static site generator, like Jekyll or nanoc (if you like Ruby), or Hugo (if you like Go). Heck, even WordPress is fine if you want to go that route.
The secret truth, which we developers never want to hear, is that the tools don’t really matter. It has taken me a long time to learn this. The content is what truly matters; the particular tool is merely a delivery mechanism for that content.
Pick one you enjoy, that feels fun to use – one that will encourage you to write. Because if your goal is to grow an audience and elevate your reputation, the writing is the main event.
Also: pretty much any tool will feel unfamiliar at first. Stick with it for a while and give it a chance. It’s easy to waste a ton of time hopping between tools because of a nagging feeling of “it just doesn’t feel comfortable.”
Speaking of hopping between tools: my own blog runs on Jekyll. I’ve considered switching to other static site generators over the years, because Jekyll isn’t perfect (no tool is), but I’ve resisted because I’m pretty sure it’ll be a waste of time. But who knows, maybe I’ll switch to Gatsby after writing this series ;)
Make It Your Own
The Gatsby starter we used, gatsby-starter-blog, comes with a few posts out of the box, and some styling that looks remarkably like Dan Abramov’s Overreacted.io blog ;) In fact, Dan’s blog is open source and you can take a look at how he set things up!
Since Gatsby is built on React, it’ll help to know some React before you get too far into customizing it.
Open up the gatsby-config.js file in the root directory, and customize the siteMetadata stuff at the top. Kyle Mathews is great but this is YOUR blog, now.
Scroll down a little further and read through the list of plugins, if you like. Or just ignore them for now.
Update the image at content/assets/profile-pic.jpg to be your own face instead of Kyle’s.
Write a New Post
This starter project is set up to look for blog posts under the content/blog directory (because gatsby-config.js told it to).
To create a new post, you just need to create a new file in there, with a .md or .markdown extension. To try it out, create a file called first-post.md under content/blog. Inside this file, write this out:
---
title: My First Post
og_image: start-blog-gatsby-twitter.png
---

Hey y'all, this is my awesome new blog!
The stuff at the top inside the dashes is called “frontmatter”. Here you can set the title, date, and other metadata about the post. The frontmatter won’t appear in the final document.
As soon as you save this, the Gatsby development server will pick it up and re-generate the blog. If you have http://localhost:8000/ open already, it’ll hot-reload with your new post on the front page.
Click on your new post. Oooh, it loads so fast! Ok, fine, it’s on localhost, and it has basically zero content, but still. It’s snappy. Gatsby makes fast sites.
If you look at the URL bar, you’ll notice that Gatsby has used the filename as the URL, without the .md extension.
Gatsby will also find files in subdirectories of content/blog, so you could create a new folder for each post if you want to. Look at the existing posts, and you’ll see that they exist as index.md files within directories. Further, notice how their URL is determined by the directory name.
Try This: What happens if you create a similar file under the content/blog/hello-world directory? Does it appear on the front page? What’s the resulting URL? Does it make sense?
Customize the Footer
At the bottom of every post you’ll notice there’s some stuff about how You “live and work in San Francisco building useful things.”
I mean, maybe that’s true. Good chance it’s not, though.
A Gatsby blog is basically a React app. This particular one has a React component at src/templates/blog-post.js which determines how each blog post is laid out. (and gatsby-node.js is the file that wires it all up)
Take a look at the blog-post.js file and you’ll notice that it’s just a React component that renders a Layout, then some SEO stuff, and eventually a Bio. All of these things are just React components, and they’re all in src/components – which means you can (and should!) customize them as you see fit.
Open up the src/components/Bio.js file and change it up. Or, if you don’t like the idea of ending your posts with a bio, just remove the <Bio/> component from the template! Easy peasy.
Have a look through all the files and directories under src. There aren’t too many of them. These, plus the gatsby-*.js files in the root of the blog directory, form the structure and configuration of the blog.
There’s lots more you can customize, and the well-written official Gatsby docs explain how to do it.
Push Your Blog to GitHub
Go to GitHub and create a new repo – public or private, either one will work. Don’t check “initialize the repo with a README” because we’re going to import the blog from your machine.
In your blog directory, initialize the Git repo, add the files, and commit them:
git init
git add .
git commit -m "Initial commit"
Then push the repo to GitHub:
git remote add origin https://github.com/yourname/your-blog-name.git
git push -u origin master
If you refresh your blog’s GitHub repo now, you should see the README file that says “Gatsby’s blog starter”. With your blog up on GitHub, you can now deploy it to Netlify.
Deploy Your Gatsby Blog to Netlify
Netlify is a great free hosting service for static sites. My own blog, the one you’re reading now, runs on Netlify. It’s easy to set up, and publishing new posts is as easy as git push.
Create a new account at Netlify. Netlify can pull from GitHub, Bitbucket, and GitLab.
Then sign in and click “New Site from Git”.
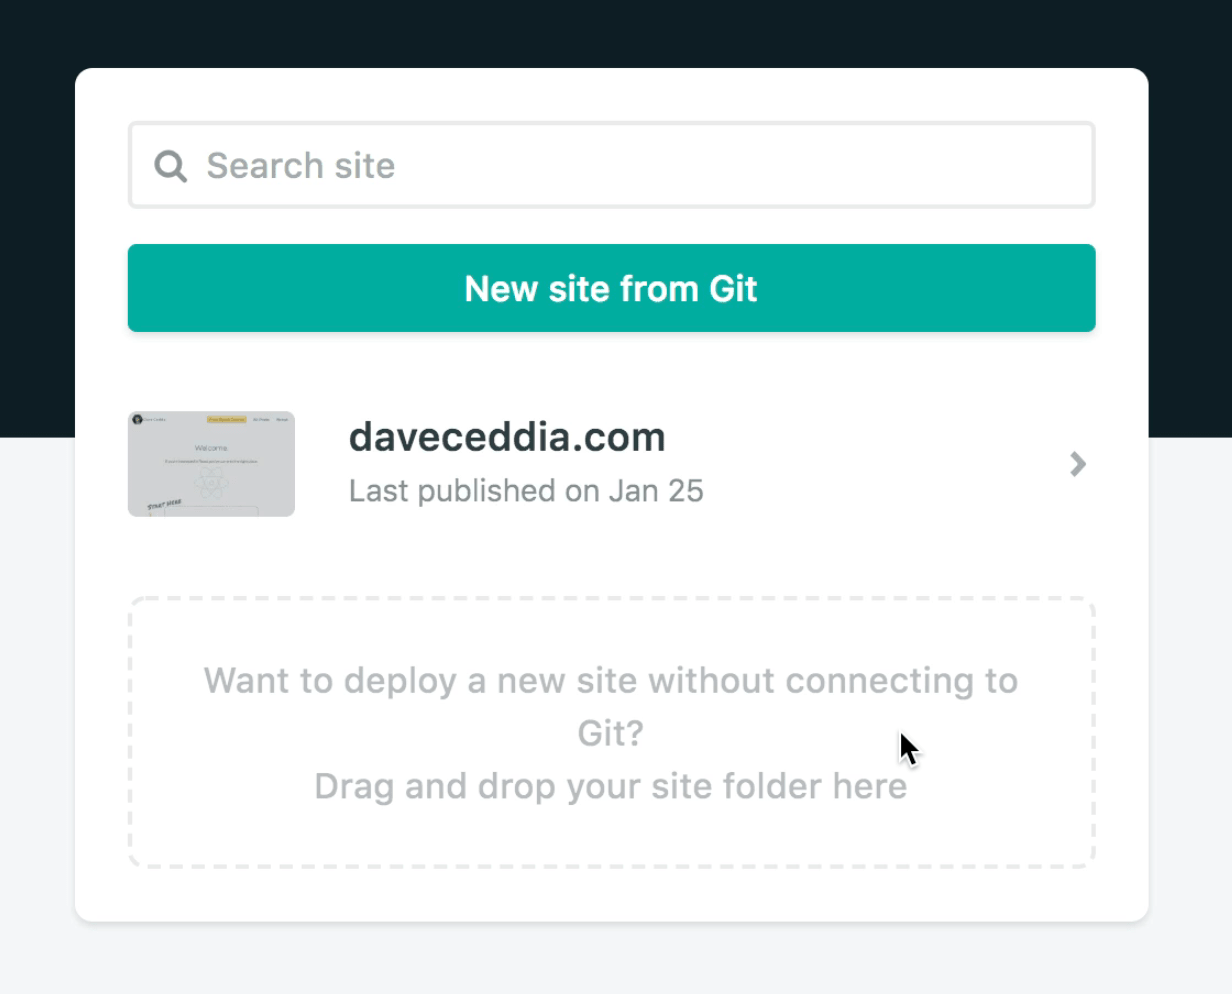
Then choose Github, and authorize Netlify to access your Github account.
Next you’ll “install” Netlify to your Github account. I’m not sure why it’s called “install” because from what I can tell it doesn’t change anything, but you can limit its access to just the blog repo.
Now you can choose the repository to deploy – pick the blog repo you created.
On the next screen, click “Deploy Site”. After a minute or so of building, your site will be published and ready to view!
It’ll have some sort of ugly URL by default, but Netlify makes it easy to point a custom domain at it if you have one. Netlify will set up free SSL for you, too. If you need a domain, I really like NameCheap and I’ve been using them for years (not an affiliate link, I’m just a happy customer).
Get Blogging!
You now have:
- a local dev environment where you can write posts and preview them
- a publicly-accessible blog
- ownership of your own content forever :)
On to Part 2
The second part of this series is all about the actual blogging part: How to come up with ideas for blog posts, how to get people to actually read them (and share them, and keep coming back) – and then, how to stick with it for the long haul, grow an audience, and use your blog as a lever for your career. Read Part 2 here.