You know how Google Chrome remembers your every search, and every website you’ve visited in your entire life, and then reveals them to the world as you’re trying to record a screencast or do a live stream?
You get as far as the “loc” of localhost:3000 before Chrome is like “oh! did you mean locust mating season? you searched for that yesterday! no problem, i’ll autofill it for you.”
There’s a way to stop that for good!
Make History. Separate From Your Other History.
You can create an entirely separate profile just for screencasting and streaming, complete with its own history and autofill settings and everything.
A whole separate set of extensions, too! No more extensions cluttering the address bar (not even that puzzle piece that’s impossible to remove!) No more worrying about LastPass or 1Password trying to autofill passwords.
Best of all, the autocomplete bar will be empty as long as the history is empty. Just clear your history, and everything in the bar will vanish.
Since it’s a separate history from your own, you can erase it back to the beginning of time without losing your own actual history.
The Easy Way: Use the Guest Profile
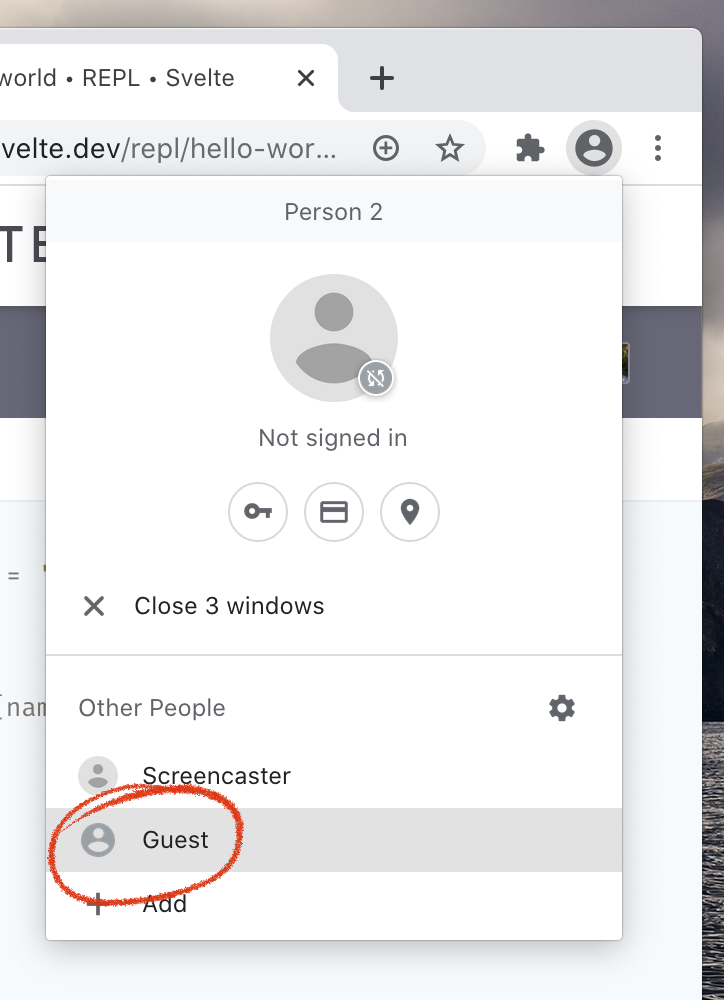
The easiest way to do this is to switch to a Guest profile. Click the little profile icon to the right of the address bar, and choose Guest.

That will pop up a new window that looks like this:

Now you’re in Guest mode, with its own separate history, and everything will be wiped out when you close this window.
If you’re picky like I am, though, you might be bothered by that big ol’ Guest icon taking up residence next to the address bar. Why can’t it be nice and small like the regular icon?
The best way to get rid of the Guest icon? Don’t use Guest mode 😎
The Better Way: Create a New Chrome Profile
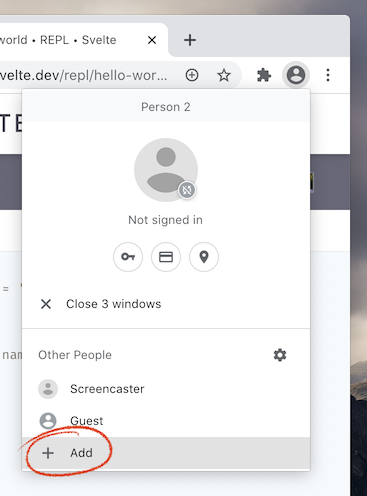
To create a new profile, click your profile icon to the right of the address bar, and click Add.

That’ll pop up a window like this, where you can choose a name (I called mine “Screencaster”) and an avatar.
Ok, fine. Just one thing though…
I’d rather the icon be as minimal and undistracting as possible. I’d hide it entirely if I could! – Chrome won’t let me – but there’s another option.
We can use a custom Chrome profile picture by putting a file in the right place.
If you don’t care, and you actually love the avatars, and especially the cat, well that’s just awesome. Create your profile and you’re all done here! I hope this was helpful.
If you do care, and you really want to use your own custom avatar, keep reading.
Either way, do finish creating this profile. We’re all done with this screen.
Use a Custom Chrome Profile Picture
You’ve created the profile, now it’s time to override the avatar image with your own.
For Mac
If you’re on a Mac, open up this folder:
/Users/[username]/Library/Application Support/Google/Chrome
The Library folder is hidden on newer versions of macOS, but you can get to it by opening any Finder window and pressing Command-Shift-G or clicking the Go > Go to Folder... menu item, and typing this in.
Alternatively: open a Terminal, and run:
open "/Users/[username]/Library/Application Support/Google/Chrome"
For Windows
On Windows (7, 8.1, and 10), open this folder:
C:\Users\[username]\AppData\Local\Google\Chrome\User Data\Default
Drop an Image Into the Profile
Inside your Chrome user data directory, each profile gets its own folder. They’re named Profile N, where N is some number that auto-increments.
You might have a Profile 1, or Profile 2, or whatever. It’s probably 1 or 2 if this is the first one you’ve made.
Copy the image you want to use as your profile photo into that folder, and rename it to:
Google Profile Picture.png
I’m not sure what the rules are for the size here, but the default was a 192x192 pixel PNG, so that’s what I used.
If you want the nondescript, undistracting, boring plain old generic user icon like I did, feel free to download this one I made:

Drop that in there and you should be good to go!
You might need to restart Chrome to get it to notice the change.
One shot, maybe?
This image seems to be pretty “sticky”.
After I dropped in my Google Profile Picture.png and saw that it worked, I tried to change it by replacing the file… but the new file didn’t update my profile photo, even after a restart.
So… be forewarned. Try to get it right on the first try ;) There’s probably a cache you can clear but I don’t know how to do it. Worst case, you can delete the profile and make a new one.