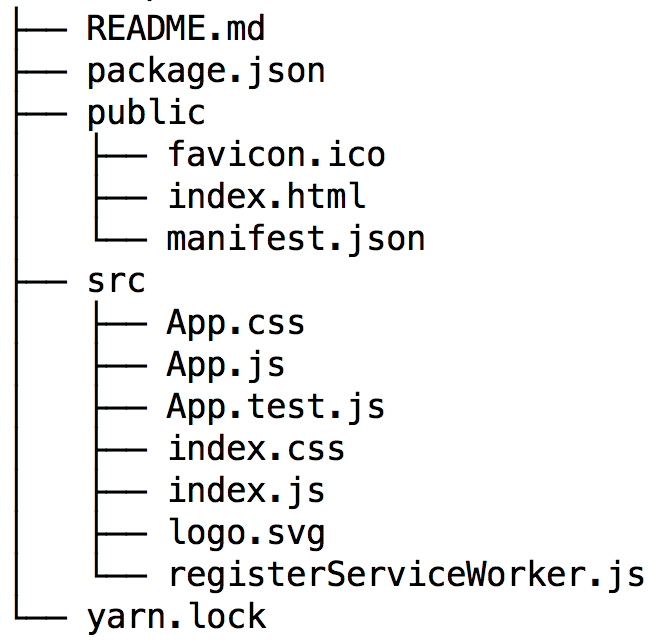
When you first run create-react-app, you’ll end up with a folder like this:

All of the code you write will live under the src folder. You can organize into subfolders as you see fit. But how should you organize it?
For this, you have a multitude of options, which is why it’s such a paralyzing thing. If you screw this up, the project could be doomed right from the beginning! At least, it feels that way.
Let me assure you right here and right now: there is no “one true way” to organize your files. Even better, you can completely screw it up – and through the magic of the mv command and a little work changing some import statements, your project will be just fine.
Don’t worry so much.
But I can tell. You don’t buy any of that. You’re still wondering what the best organization method is. Fine.
Before we go on, make sure you’re familiar with the idea of Presentational vs Container components (aka Smart vs Dumb).
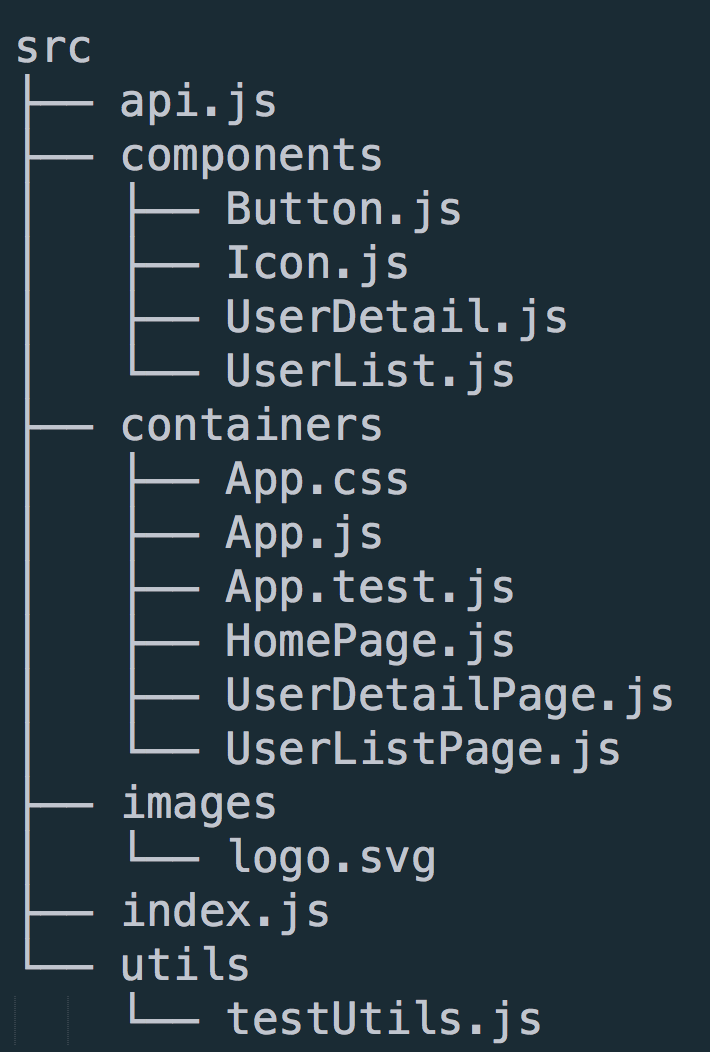
Here’s the folder structure I recommend starting with, and it’s the one I always start with myself:

You can make this more granular over time, and move things around as you see fit, but let’s go over what’s here.
-
src/api.js- You’ll probably need to make calls to a backend API at some point. Put all that code here. If it gets too unwieldy in one file, make asrc/apidirectory and put the area-specific API files under there – likeuserApi.js,productApi.js, etc. -
src/components- All your Presentational (aka Dumb) components go here. These are the simple stateless ones that just take props. -
src/containers- The Container components go here. These are the stateful ones, and the ones that make the API calls. If you’re using Redux, these are the ones that are connected to the store. Notice that CSS and tests are in the same folder as their respective components. -
src/images- Put the images in one place to start with. -
src/index.js- This is where you initialize the app and call ReactDOM.render, so it makes sense to keep this at the top level. -
src/utils- You’ll probably end up with miscellaneous utility functions – error handlers, formatters, and the like. I usually put them in a file inside utils so I can access them easily.
My favorite thing about this structure is that it’s simple. I don’t have to think very hard about where to find a component, or where to put a new file. It’s amazing how much time you can save when the only decision you have to make at the time you create a file is whether it’s a presentational or container component.
Easy Imports
Create React App supports the NODE_PATH variable for setting up custom import paths. That means you can turn this:
import Thing from '../../components/Thing'Into this:
import Thing from 'components/Thing'
// or even
import Thing from 'Thing'
To enable this awesome power, all you need to do is open your package.json file and look for this line:
"start": "react-scripts start",And insert NODE_PATH like this:
"start": "NODE_PATH=src react-scripts start",If you’ve got more than one path you can separate them with colons like NODE_PATH=src:src/components:src/containers.
Testing
Jest supports NODE_PATH as well, and to make that work you’ll want to add NODE_PATH to the test script like so:
"test": "NODE_PATH=src react-scripts test --env=jsdom",One caveat: mocks may not work as expected until this issue is resolved.
Windows Support
Since Windows handles environment variables differently, you’ll need the cross-env package to make this work. /ht to Dan Abramov for pointing this out.

Install it:
yarn add -D cross-env
# or npm install -D cross-env
And then change the scripts to include it:
"start": "cross-env NODE_PATH=src react-scripts start",
"test": "cross-env NODE_PATH=src react-scripts test --env=jsdom",
Redux
If your current level of comfort with React leads you to read articles about how to best organize your project, you probably do not need Redux yet. Learn React by itself first. It doesn’t have to be a full-on Semester of Study or anything – take a few days to learn React, and then go learn Redux.
When you add Redux to your project, start off with something like this:
-
src/redux/actions- Create a file for each set of related actions, likeuserActions.js,productActions.js, etc. I like to bundle action creators and the related action constants in the same file. -
src/redux/reducers- Create a file for each reducer, and anindex.jsin here to contain the “root” reducer. -
src/redux/configureStore.js- Create and configure the store here. You can justimport rootReducer from './reducers'.
If you hate having to jump between files to create an action, check out the Ducks pattern where a reducer + related actions + types are all contained in a single file.
Another Way
An alternative is to organize files by “functional area” rather than “kind”, with folders like users, products, and profile. The users folder might contain UserDetailPage.js and UserListPage.js.
This organization style starts off deceptively simple. Inevitably you end up with a folder like common to hold the Button.js and Icon.js. And then you might want common/containers and common/components. At some point it grows out of control, with directories 3 levels deep, and now whenever you have to create a new file you break out into a full sweat. WHERE SHOULD IT GO?!!
Simple is better. Start simple. Keep it simple, if you can.
In Summary
- To start off, organize your project something like the screenshot above
- Tweak it as you need to (don’t stress about getting it perfect on day one)
- Err on the side of fewer folders and fewer levels of nesting until the flat structure becomes a problem.