One of the difficulties many newcomers to Angular face is that they’re used to “thinking in jQuery.” Angular requires a new way of thinking about building applications, a more systematic approach than the patchy/hacky style that jQuery promotes.
So let’s look at a couple examples and go over the jQuery Way versus the Angular Way.
Let me just put an asterisk on that “without jQuery” in the title, though: Angular ships with something it calls “jqLite”, which is essentially a stripped-down version of jQuery. When you use angular.element, that’s invoking jqLite.
What we’re really talking about here, though, is how to “think in Angular,” even though we are still using jQuery-like functions in the implementations.
Clicking a button
We’ll start with a really simple example: reacting to a click event on an element.
In jQuery, the thought process would go like this:
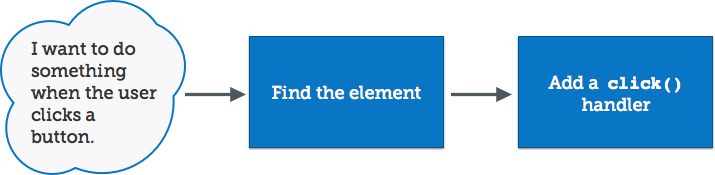
The code would probably look something like this:
$('.btn.fire-ze-missiles').click(function() {
// perform missile launch sequence
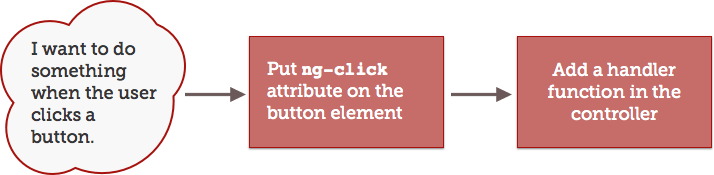
});In Angular, we should think about it differently. It’s not that the jQuery approach won’t work – there’s nothing in either framework that’ll stop you from pasting that same code into a controller or something. But you miss out on the cleaner, more declarative (and more reusable) style that Angular is good at.
So with Angular, the thought process is more like this:
This code is split across a couple files: the HTML file with the button, and the JS file with the controller + click handler.
<div ng-controller="MissileController as mc">
  <button ng-click="mc.fireZeMissiles()">Fire Ze Missiles</button>
</div>angular.controller('MissileController', function() {
var ctrl = this;
ctrl.fireZeMissiles = function() {
// perform missile launch sequence
}
});The difference might be subtle, and Angular actually requires more lines of code to accomplish the same feat. But there are advantages to the Angular approach:
-
Behavior is evident from the HTML - You can simply look at the HTML and understand what’s happening when the user clicks that button. With jQuery, you’d have to hunt for a selector in your JS to figure out the what the button does.
-
A bit of reusability - I admit this isn’t a great example of reusability, but you can imagine how the
MissileControllercould be applied to another button elsewhere, or how a second Fire Missiles button could be added with no change to the JS code.
Interacting with elements
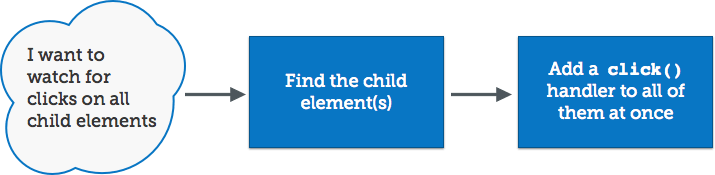
Now that we’ve seen a simple ‘click’ example, let’s look at something slightly more complex, where we interact with the DOM element itself. Given some parent element, we’ll watch for clicks on any child elements and keep a count.
In jQuery, you’d do it this way:
var clickCount = 0;
$('.parent *').click(function() {
  clickCount++:
});
In Angular however, the best way to interact with DOM elements is through directives.
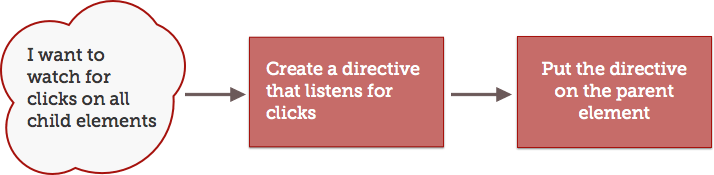
Their syntax will seem foreign at first, but they are very powerful once you get used to how they work. Practice by creating a bunch of directives to do simple little things.
<div count-clicks>
  <button>Fire Ze Missiles</button><br>
  <input type="text" /><br>
  <span>Some <em>emphasized</em> text</span><br>

  clicks: {{ clickCount }}
</div>angular.directive('countClicks', function($timeout) {
return {
restrict: 'AE',
link: function(scope, elem, attrs) {
scope.clickCount = 0;
elem.on('click', function() {
// This $timeout trick is necessary to run
// the Angular digest cycle
$timeout(function() {
scope.clickCount++;
});
});
}
};
});Check out the Plunker and try clicking around.
So what’s going on here? The countClicks directive (referred to in the HTML as the dash-case count-clicks) returns a directive definition object.
The link property is a function that defines the directive’s behavior. It gets called a single time, when the directive is first initialized, and is passed 3 arguments*:
- scope is the scope inside the directive. In our example, it inherits from the parent scope, but it can also be an “isolate scope” which does not inherit any properties from the parent.
- elem is the element that the directive was placed on. This is a jqLite object, which is Angular’s version of a jQuery element. It supports some of jQuery’s functions, but it’s a bit limited. If jQuery is used in your project (and included before
angular.jsin your HTML file), this will be a real jQuery element instead of jqLite. - attrs is an object containing the attributes on the directive. We’re not using it here, but if you were to insert an attribute on the directive’s
divsuch as<div count-clicks reason="world domination">, thenattrs.reasonwould be set to"world domination".
* I said “3 arguments” above, because that’s all we’re using here, though it will actually accept a couple more. See the Angular docs for the link function if you’re interested.
To track clicks on child elements, we’re relying on the fact that events bubble up the DOM, so that clicks on child elements will eventually be received as clicks on the parent element (unless one of those children calls event.preventDefault()).
That’s pretty much it!
You can see another example of a simple directive in the Angular docs.
Practice
The best way to get used to this stuff is to do it a lot. Go and create some simple apps that use directives until you’re used to the format of the directive definition object and understand all the typical options. Once you’re comfortable with the basic workings, look into transclusion.
Good luck! Leave questions below, and let me know if you’d like to see me write about something in particular.
Oh! And sign up for my newsletter – I send out these articles as I publish them, a couple times per month.